Available on ebay HERE
Sunday 28 June 2015
Truly Victorian #324 Long Draped Overskirt
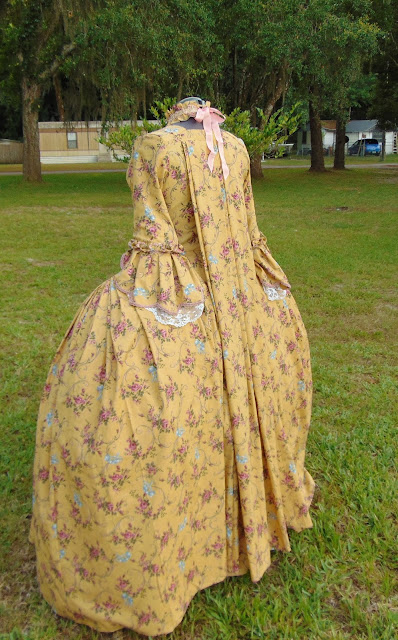
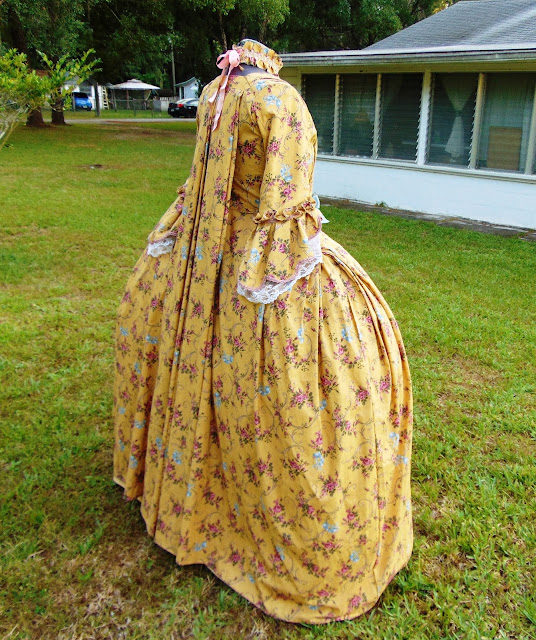
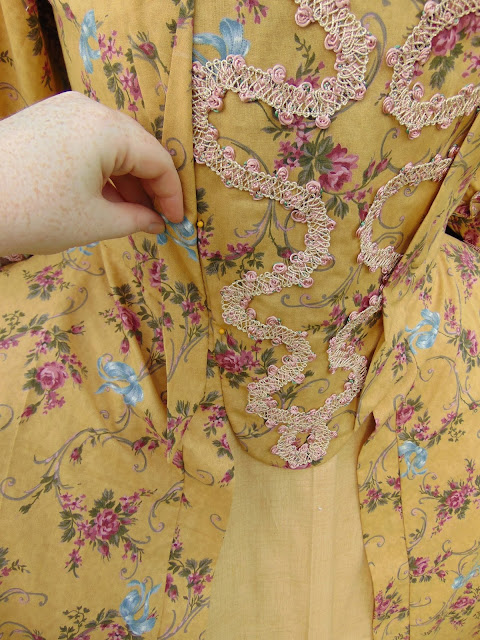
I whipped up this natural form era dress from some cotton I had on hand. I altered the bodice from a pattern so much that the original pattern is essentially meaningless. I may as well have just drafted it. Same with the underskirt. So, the only discernible pattern from the whole thing is the TV #324 Long Draped Overskirt.
Sunday 21 June 2015
Simplicity 3637 - Robe a la Francaise CONSTRUCTION
Fabric: Cotton Print
Size: pattern size 20. 34" waist & 42" chest
*The step-by-step instructions in this pattern are pretty good for the most part, so I won't bother belaboring every step. I will note areas that are lacking, though.
*The step-by-step instructions in this pattern are pretty good for the most part, so I won't bother belaboring every step. I will note areas that are lacking, though.
First, I will say that I went into this pattern as an experiment, which is why I was not particularly bothered about strict historical accuracy of the fabric. A Francaise of this formal width would not have been made of cotton, but there is no way I can afford 20 yards of silk! Yes, this pattern calls for TWENTY YARDS! I will talk a great deal about yardage as I go, but be assured that even if you don't do the fussy puff trims or cut the back in the ridiculous manner the pattern recommends (more on that later) you will still need at least 18 yards to complete the dress and petticoat.
I wanted to try this pattern to test it's historical accuracy. After all, I got it for a dollar and who can beat that? Overall, it is remarkably accurate. I was thrown by the horizontal waist seams since the only Francaise I've ever made (JP Ryan) does not have separate skirt pieces. I did find multiple extant examples of these gowns with waist seams, so that's fine. The front hook and eye closure, although no the most common, was also done (though I would still recommend doing something else. The hook and eyes are messy looking and give it a costume look). Over all, here is a short breakdown of the alterations I ended up making:
Since people usually cut out all their pieces before they start construction, I will start my notes there because there are definitely some changes you will want to make with cutting your pieces.
First, the sleeves. The sleeves on this pattern are jacked! I mean, really messed up. They are, in my opinion, backwards. The seam rests at the back of the arm, but curves out, contrary to the natural angle of the arm. Also, the guide for setting the sleeve into the armholes caused the shorter edge of the cuff (the part that will rest in the bend of your elbow) to face almost directly outward from the body instead of forward, once again contrary to the natural way in which a person's arm bends. Wild!
Here is the sleeve pattern piece shown flat and folded:
I tried to just set them into the armholes differently, but nothing worked. I eventually gave up and just used the sleeves from a different 18th century pattern I have. Below are pictures showing my alterations to the sleeves, where I cut the tops off into a new shape. I didn't realize the sleeve problem until I had already made them, so I was forced to make alterations on the finished sleeves. You can save yourself the trouble by just cutting them differently to begin with.
The sleeve as is, with my cut markings:
Cut made and folded back:
New sleeve with altered top:
At first, I wondered if I had put the flounces on backwards and that was why the sleeves just "wasn't right", but I'm sure I didn't. The longer part of the cuff that sits behind the elbow is just in the wrong spot. This sleeves pattern doesn't work unless the seam is facing forward, and no one wants that. So...enough about the sleeves! They're messed up. Forget the pattern piece and use something else, or just get an eyeball on a similar one-piece sleeve from one of the costume books and draw a sleeve out yourself.
Second, the back piece. The long center-back section that eventually forms the Watteau pleats is, according to the pattern, comprised of two pieces 23.5" x 66" Now, if you're using a 45" wide fabric, this creates a wasteful problem because you don't have the width to just cut two nice 23.5" wide pieces all the way down to 66". Instead, you have to cut the piece twice, wasting a huge section of the fabric width. Don't bother doing this.
Instead, just cut one piece 45" wide (using the whole width of your fabric) and probably about 58 or 60" long. I am 5'7" and I ended up having to cut 9" off the bottom of this thing, so don't waist yardage going all the way down to 66", not unless you are very tall or you prefer a very wide hem.
The final piece you get will be only 1.25" inches narrower than what the pattern wants, but adjusting the Watteau pleats slightly is well worth avoiding all that wasted yardage. Plus, you don't have a center-back seam =) And my Watteau pleats formed up just fine despite the loss of the 1.25"
By this point (above) the bodice and the back portion are ready for the skirt panels to be attached. the blue portions you see there are the front lacings that will be covered by the stomacher.
The Watteau Pleats:
Now, the thing about Watteau pleats is that they have to be folded in a particular order to get the final effect. This patterns directs you to start at the center back and fold the "solid line to meet the dotted line" as you go out. That DOES NOT WORK. You can't fold all the pleats just from the center-back on. If you do, the final result will look nothing like it should. Instead, they have to folded in this order *see below*
I have written the numbers on the pattern.
The biggest alteration I made was to the front of the bodice. In addition to making the front a lacing closure rather than hooks/eyes, AND making the stomacher, I had to devise a method of hiding the edges of the stomacher. In an authentic gown, this would be accomplished by the folded "robings" at the edge of the front pieces, or by the ruffled edge of a trim. Since this pattern does not feature built in robings, I decided to make false robings. I basically blind stitched a fold of fabric to the fronts of the bodice to hide the edges of the stomacher and give the illusion that the fold was part of the original pattern cut. There are extant examples of stomachers just pinned on with no trim or robings covering the edges, but I didn't really like that.
BUT, I also found extant examples of false robings, so even that's okay in the accuracy department! =D
Finally, I would highly recommend that you measure for skirt lengths before you cut your pieces. This pattern has the hems running VERY long. As I wrote earlier, I am 5'7" and I ended up having to cut nearly 10 inches off the hem of the dress and petticoat.
To see many MANY photos of the finished dress, go HERE
Since people usually cut out all their pieces before they start construction, I will start my notes there because there are definitely some changes you will want to make with cutting your pieces.
First, the sleeves. The sleeves on this pattern are jacked! I mean, really messed up. They are, in my opinion, backwards. The seam rests at the back of the arm, but curves out, contrary to the natural angle of the arm. Also, the guide for setting the sleeve into the armholes caused the shorter edge of the cuff (the part that will rest in the bend of your elbow) to face almost directly outward from the body instead of forward, once again contrary to the natural way in which a person's arm bends. Wild!
Here is the sleeve pattern piece shown flat and folded:
I tried to just set them into the armholes differently, but nothing worked. I eventually gave up and just used the sleeves from a different 18th century pattern I have. Below are pictures showing my alterations to the sleeves, where I cut the tops off into a new shape. I didn't realize the sleeve problem until I had already made them, so I was forced to make alterations on the finished sleeves. You can save yourself the trouble by just cutting them differently to begin with.
The sleeve as is, with my cut markings:
Cut made and folded back:
At first, I wondered if I had put the flounces on backwards and that was why the sleeves just "wasn't right", but I'm sure I didn't. The longer part of the cuff that sits behind the elbow is just in the wrong spot. This sleeves pattern doesn't work unless the seam is facing forward, and no one wants that. So...enough about the sleeves! They're messed up. Forget the pattern piece and use something else, or just get an eyeball on a similar one-piece sleeve from one of the costume books and draw a sleeve out yourself.
Second, the back piece. The long center-back section that eventually forms the Watteau pleats is, according to the pattern, comprised of two pieces 23.5" x 66" Now, if you're using a 45" wide fabric, this creates a wasteful problem because you don't have the width to just cut two nice 23.5" wide pieces all the way down to 66". Instead, you have to cut the piece twice, wasting a huge section of the fabric width. Don't bother doing this.
Instead, just cut one piece 45" wide (using the whole width of your fabric) and probably about 58 or 60" long. I am 5'7" and I ended up having to cut 9" off the bottom of this thing, so don't waist yardage going all the way down to 66", not unless you are very tall or you prefer a very wide hem.
The final piece you get will be only 1.25" inches narrower than what the pattern wants, but adjusting the Watteau pleats slightly is well worth avoiding all that wasted yardage. Plus, you don't have a center-back seam =) And my Watteau pleats formed up just fine despite the loss of the 1.25"
By this point (above) the bodice and the back portion are ready for the skirt panels to be attached. the blue portions you see there are the front lacings that will be covered by the stomacher.
The Watteau Pleats:
Now, the thing about Watteau pleats is that they have to be folded in a particular order to get the final effect. This patterns directs you to start at the center back and fold the "solid line to meet the dotted line" as you go out. That DOES NOT WORK. You can't fold all the pleats just from the center-back on. If you do, the final result will look nothing like it should. Instead, they have to folded in this order *see below*
I have written the numbers on the pattern.
The biggest alteration I made was to the front of the bodice. In addition to making the front a lacing closure rather than hooks/eyes, AND making the stomacher, I had to devise a method of hiding the edges of the stomacher. In an authentic gown, this would be accomplished by the folded "robings" at the edge of the front pieces, or by the ruffled edge of a trim. Since this pattern does not feature built in robings, I decided to make false robings. I basically blind stitched a fold of fabric to the fronts of the bodice to hide the edges of the stomacher and give the illusion that the fold was part of the original pattern cut. There are extant examples of stomachers just pinned on with no trim or robings covering the edges, but I didn't really like that.
BUT, I also found extant examples of false robings, so even that's okay in the accuracy department! =D
Finally, I would highly recommend that you measure for skirt lengths before you cut your pieces. This pattern has the hems running VERY long. As I wrote earlier, I am 5'7" and I ended up having to cut nearly 10 inches off the hem of the dress and petticoat.
To see many MANY photos of the finished dress, go HERE
Simplicity 3637 - Robe a la Francaise COMPLETE
Simplicity 3637
Robe a la Francaise
with alterations
*Shown over steel hoop panniers & quilted petticoat
Pattern size 20.
100% cotton
available on ebay HERE
The pattern calls for 20 yards at 45". In my making, the main dress took 13 yards and the petticoat took 5.5 yards. Thus, the yardage called for is pretty darn close.
Saturday 13 June 2015
Regency Bonnet - Repurposing a Vintage Pillbox Hat
As I have stated many times, when it comes to historical accuracy my only concern is the look of the finished product. It must LOOK authentic. It does not need to be BE authentic (You don't want to know the ways I have jerry-rigged a bustle from household crap). Following that notion, I don't blink at the idea of turning modern stuff into "old" stuff. So, here we have a...
I am guessing at the age of the hat, which I got at a flea market for $6. The body of the hat is covered in a velvety material that is most definitely artificial. The fur is certainly real (I did the burn test), but I have no idea what the fur is. I am terrible at identifying furs and hides. If I find out what it is, I will update this post. [UPDATE] So, it would seem the fur is mink. My many fellow costumers agree, and now I feel silly for not recognizing the fur of furs.
Regency Era Winter Hat,
featuring a Repurposed 1960s Pillbox Hat
I am guessing at the age of the hat, which I got at a flea market for $6. The body of the hat is covered in a velvety material that is most definitely artificial. The fur is certainly real (I did the burn test), but I have no idea what the fur is. I am terrible at identifying furs and hides. If I find out what it is, I will update this post. [UPDATE] So, it would seem the fur is mink. My many fellow costumers agree, and now I feel silly for not recognizing the fur of furs.
Currently on ebay HERE
Saturday 6 June 2015
1894 Double-Breasted Suit - Brown Serge Cotton VIDEO
I'm not sure if this adds anything to the viewing experience of the dress, but my brand new camera takes wonderful video and audio, so I just couldn't resist. Enjoy ;)
I did another one of these types of videos a few years ago showing the manner in which a robe a la francaise is constructed, but I deleted the google account it was attached to and it vanished from YouTube. And I didn't think to save it before I deleted the account. Ugh! Gone forever! =/
I did another one of these types of videos a few years ago showing the manner in which a robe a la francaise is constructed, but I deleted the google account it was attached to and it vanished from YouTube. And I didn't think to save it before I deleted the account. Ugh! Gone forever! =/
Wednesday 3 June 2015
1894 Double-Breasted Suit - Brown Serge Cotton
1894 Double-Breasted Walking Suit
Brown serge cotton
featuring antique cloth chemisette*
*See bottom of post for information on chemisette
~Patterns~
Jacket: Combination of Truly Victorian #496 "1896 Ripple Bodice", and Truly Victorian #464 "1883 Riding Habit Bodice"
~Fabric~
~~~I ran across an amazing cotton serge fabric at a Wal-mart for only $2 a yard. I took the whole 19 yards, so I have plenty left still =D. Wal-mart is hardly the go-to place for quality fabrics, but once in while you score something unexpected on their clearance pile, usually because those fabrics are manufacturer surplus that Wal-mart buys for almost nothing. I actually got 100% heavy weight linen from a Wal-mart once for only $3.50 a yard!
Subscribe to:
Posts (Atom)


