Thursday 26 February 2015

And the 1893 Jacket Goes To....

Thanks so much to the lovely lady who purchased one of my recent dresses (the 1893 France Mode Jacket). She was kind enough to send me pictures, which are always appreciated because I rarely see my dresses on real people. Thanks again! =D


Tuesday 24 February 2015

La mode Illustree from December 8th, 1889. Pt.3

With the Skirt
   I went ahead and made up the skirt too, though I did not use the pieces from the La Mode Illustree pattern. I just eyeballed it from the fashion plate and made up my own, with some help from the skirt instructions on the pattern (Thanks soooo much to Sue Fischer for translating the French).

The skirt is a basic gored underskirt with a strip of silk pleated to the front. I then folded the vertical edges where the silk lay and stitched, almost giving the illusion that the center front silk was a separate panel entirely. It's really fussy if you can't get the silk to pleat in right. Fashion plates always show these perfect vertical knife pleats on dresses, but 9 times out of 10 you can't get them to lie flat in reality, lol. 


Monday 23 February 2015

La mode Illustree from December 8th, 1889. Pt.2

I finished the bodice from the La Mode Illustree dress. There are a few fussy parts, but that's mostly due to having NO construction instructions (they are on the supplement, but I can't read French, lol).


Sorry my picture looks kind of "meh". My dress form was not the proper size, so I had to pad it, making it a bit lumpy in the torso there, lol.

To get an idea what the pattern pieces look like, here is the layout as it appears on the extant supplement. This pattern actually comes with a lot of instructions (that whole paragraph you see under the layout). If only I could read French =P. I am posting the picture in it's original size so you can hopefully read it.
Excerpt from pattern supplement. La Mode Illustree - December 8th, 1889.


The Skirt: I have not actually decided yet if I will try to make the skirt featured with this pattern. For one, it's very simplistic and I can probably make it just from sight without going through the trouble of tracing out another piece. For second, the skirt pieces are in the pattern at 1/20 scale. It would be a lot of work to trace out and re-scale something that is, when you get down to it, just a few rectangular patterns and a standard sloped front piece. We'll see...


Friday 20 February 2015

La Mode Illustree from December 8th, 1889.

I started the first dress, Fig.1, from the 12/8/1889 issue of La Mode Illustree, and I think it just might be all right ;)

Tracing out this pattern was pretty simple. La Mode Illustree had well made patterns with good, clear markings and easy to read symbols (Unlike Salon de la Mode =P) I typically use plain white paper and/or Christmas wrapping paper with a plain back (great price after the holidays), which I then trace through with a tracing wheel. However, I certainly wasn't going to damage an antique pattern by punching lines of holes through it. So, I bought this 50 yard roll of art tracing paper. The stuff is AMAZING.
The antique pattern, which I could never bring myself to damage.

The roll of tracing paper with the pieces already traced out. I use a china marker (grease pencil), but you can use anything. Even a sharpy marker won't bleed through the tracing paper=) 
This pattern came out incredibly small. In the original, the waist is about 22". Now, I am terrible at scaling and/or upsizing patterns. I can increase a waist and add some to a bust easy enough, but when it comes to transforming a 22" waist petite into something that will fit a 30" waist average and still maintain the proportions and style of the original...mmm...my skills end up lacking. So, I just increased everything by 1/2" on all sizes and told myself that other tweaks would have to be made on the form.
I usually don't bone bodices because I want people to have the option to machine wash, and bones make that quite difficult. In this case, though, it is necessary. That center front dart there HAS to be straight to look right, so boning it is. 
For the fabric, I have decided to go with a pastel sea-foam green wool that I bought a few years ago for $4 a yard. Seriously, how could I NOT buy the entire bolt when it was 100% wool and $4 a yard? Below you can see my workup of the bodice so far.

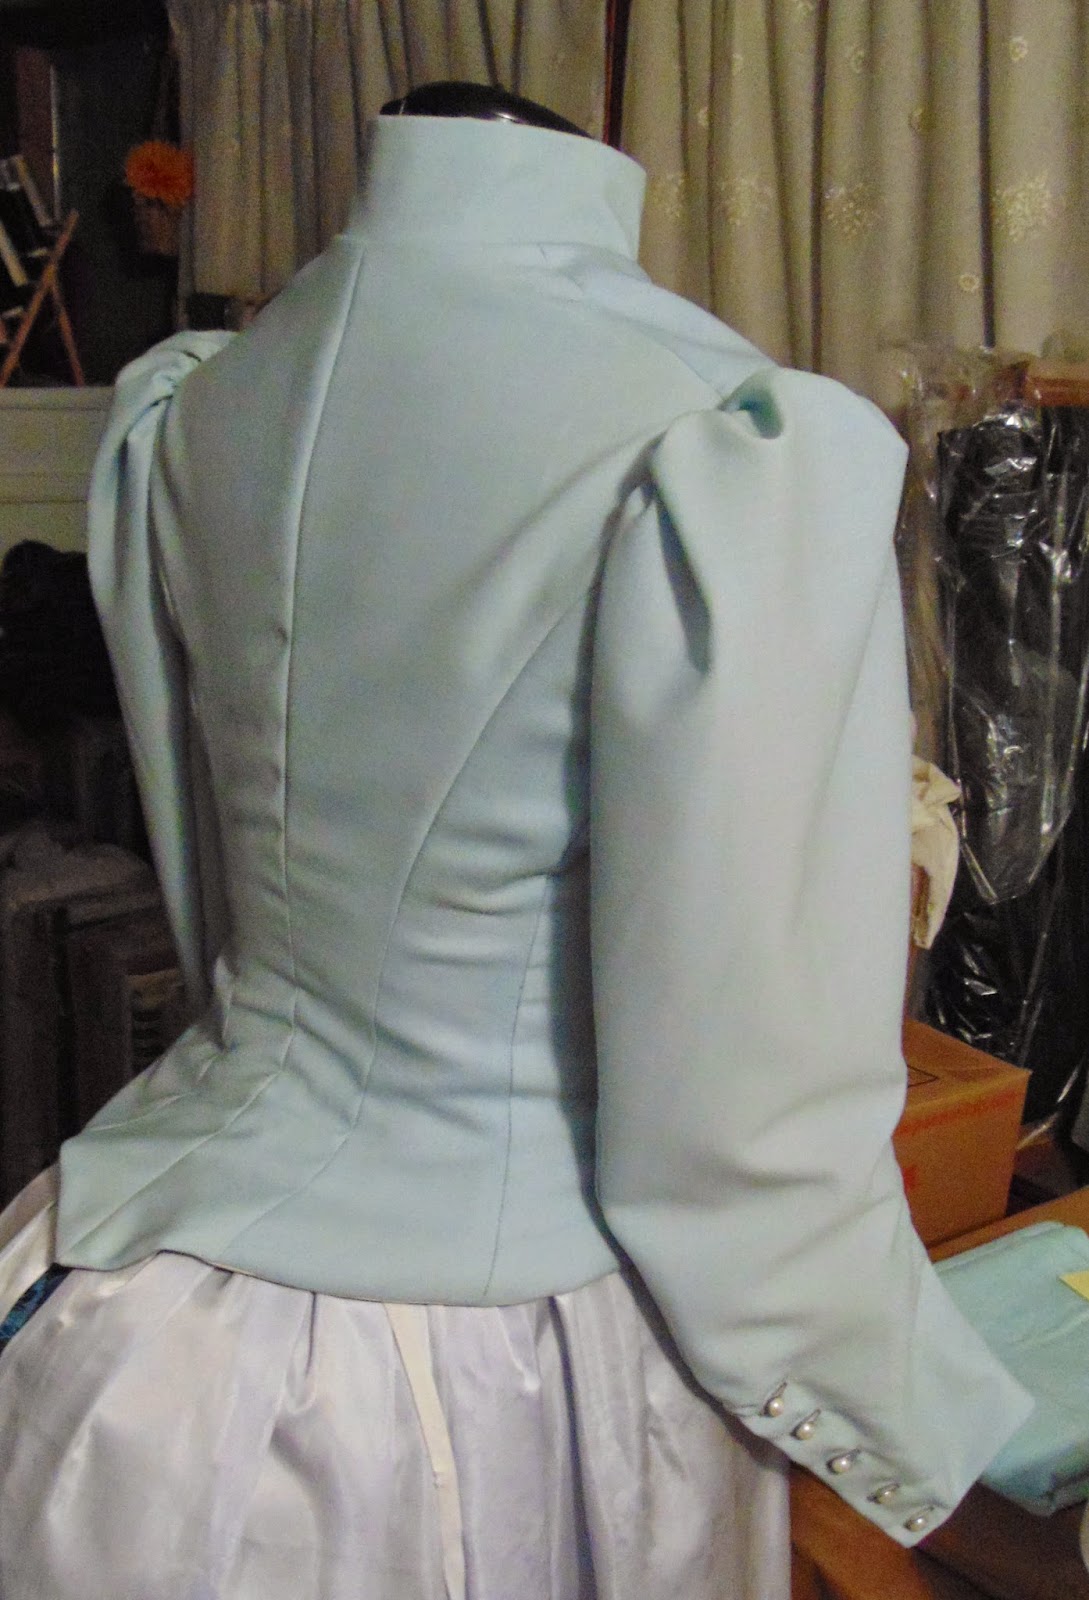
As you can see on the side there, my slap-dash method of increasing the size went a bit far, lol. I'll have to take that seam in by about 1.5", and on the other side as well. 

Thursday 19 February 2015

Gray Plaid Suit from Truly Victorian #290 and #464

~Of course, The Antique Sewist doesn't just make garments from antique patterns (I would quickly go broke acquiring them). I also love, Love, LOVE the Truly Victorian pattern company =)


I recently finished a very simple dress set from TV skirt pattern #290, "1889 Draped Skirt", and bodice pattern #464, "1883 Riding Habit." I have used both patterns many times and just love them. If I had a genie lamp to rub, I would wish to have the pattern drafting/sizing skills of the Truly Victorian company proprietor, LOL.

**As a side note, I think I may have recently acquired the actual antique pattern that Truly Victorian used to make the #464 skirt. I'm not sure, but this plate from the 1889 issue of La Mode Illustree that I have looks damn similar. It's the dress on the right:


The original pattern calls for hooks and eyes on the right side (underneath) with buttons sew to the outside for the appearance of being double-breasted. While this is fine and works very well, the shank buttons I had have a very long shank, which mean they would have been flopping and hanging on the "false" right side. Meh. To fix it, I just went with real button holes for both rows of buttons. 


Showing the pink rayon lining inside, along with bias binding on the bottom edge. As you can see, I took this pic before I had a chance to trim and bind the armhole seams, LOL. 


I was going to crop this photo to get rid of the "dead space" on the right side, but when I saw it I kind of liked it. I can imagine it being a book cover, with the dead space holding the title and other information. Although what sort of book, I can't imagine. Still, I like it, LOL. 


Showing the puffs as they appear on the outside
Showing the ribbon inside, which forms the back puffs. I like the fold the spot that will be stitched, then stitch through the two layers and the ribbons. =) 


I made a pretty severe mistake with this, but didn't realize until construction was over. Even if I had the patience to tear everything apart and fix it, I couldn't. I used every scarp of fabric and there was nothing left =( 


Friday 13 February 2015

Tackling the Terror - The End

So I finished the horror movie, and I may have overreacted a bit. Alright, I'm sure I did...

I've seen this so many times in the past that I'm a bit ashamed I didn't see it this time. It's when a garment looks like a lost cause UNTIL you put all the pieces together. Then you stand back and say, "Oh, yeah. Now I see it."

~The Finished Product~
Simplicity #4244 (with many alterations)
The alterations include:
  • No train
  • No triangle trimmings
  • No standing collar
  • No bows
  • No hem ruffle
  • Added interfacing, lining, and netting to various parts.
  • Added contrast ribbon trim.
  • Added ruched lace as neckline trim


One of my favorite parts of this pattern is the vertical trim on the center from of the skirt. I really like the combination of flat lace and puffed fabric over it. I will probably use it in future projects =) 


Side view showing the nature of the side drapes. The front is pleated into the side seam, then the remaining bit (which you keep out of the seam) is swept back and pleated at its end. The ends of both sides are joined and stitched to the center back. 


Back view. As you can see, there is still some issue with the hang of the fabric here.