
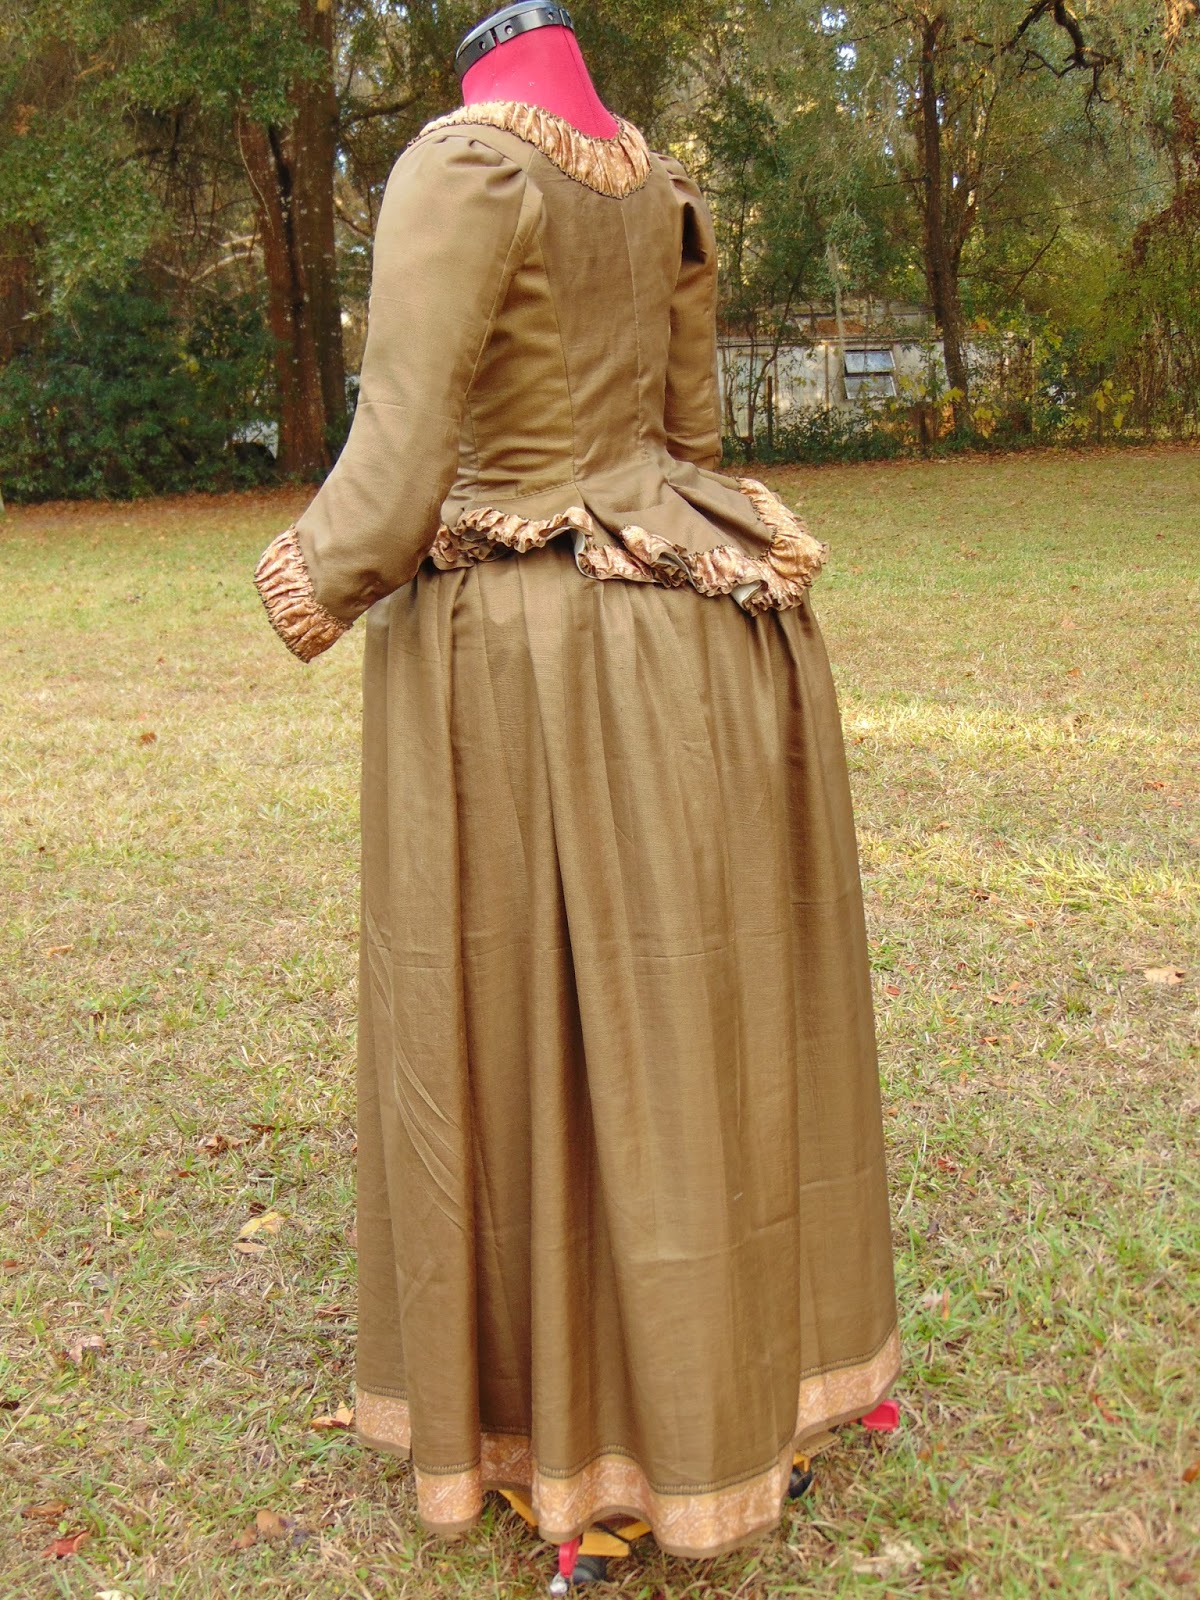
Fabric: 100% silk, Indian, made from a single 5 meter sari.
Interlining of cotton twill, medium weight.
Lining of cotton osnaburg, unbleached.
Chest: 34-35"
Waist: 27-28.5"
Hip: Free
Hem: 37" at front, 40.5" at back. Cut to fit over large bum roll.
Back width: 11.5" (18th c. silhouette, shoulders thrown back more than typical of modern figures)
Upper Arm Circ.: 13" max.
Closure Method: Spiral lacing at front, covered by pinned stomacher. Jacket edges are then pinned to the stomacher to conceal.

**The rest of the finished garment images begin about half way down the post
~Description~
A 1760s Casaquin jacket and petticoat, done in plain weave India silk taken from a single 5 meter long Sari. Th silk is woven in a micro check pattern of black and brown. The petticoat hem and ruching trim on the jacket are made from the selvage edge borders of the silk length, comprising small paisley designs in shades of brown, orange, and muted pink. The construction is a mix of mostly hand stitching with some machine stitching done on inside areas not visible during wear.
This type of silk is high thread count and tightly woven, but also quite thin, so the jacket is interlined in brown cotton twill and fully lined in unbleached cotton osnaburg. The petticoat is shown over another under-petticoat over plain brown cotton.
~Cutting Out the Pieces~
Please note that making a garment such as this from the length of a single sari means positioning pieces as close as possible with no allowance for pattern direction or matching stripes, etc. Size also matters; I cut pieces for a relatively small size and they barely fit. Larger sizes would most likely not fit or would require piecing.

(below) the back and front pieces laid out on the osnaburg lining.

~Jacket~
Although I stated first that I used no pattern for this garment, I did actually start with the 1760 Jacket (diagram XXX) from Waugh's The Cut of Women's Clothes. But, as you can see in the pictures, I altered it so drastically from the originally, that is bares virtually no resemblance. The sleeves are unaltered from that pattern, so I cannot claim to have drafted them.
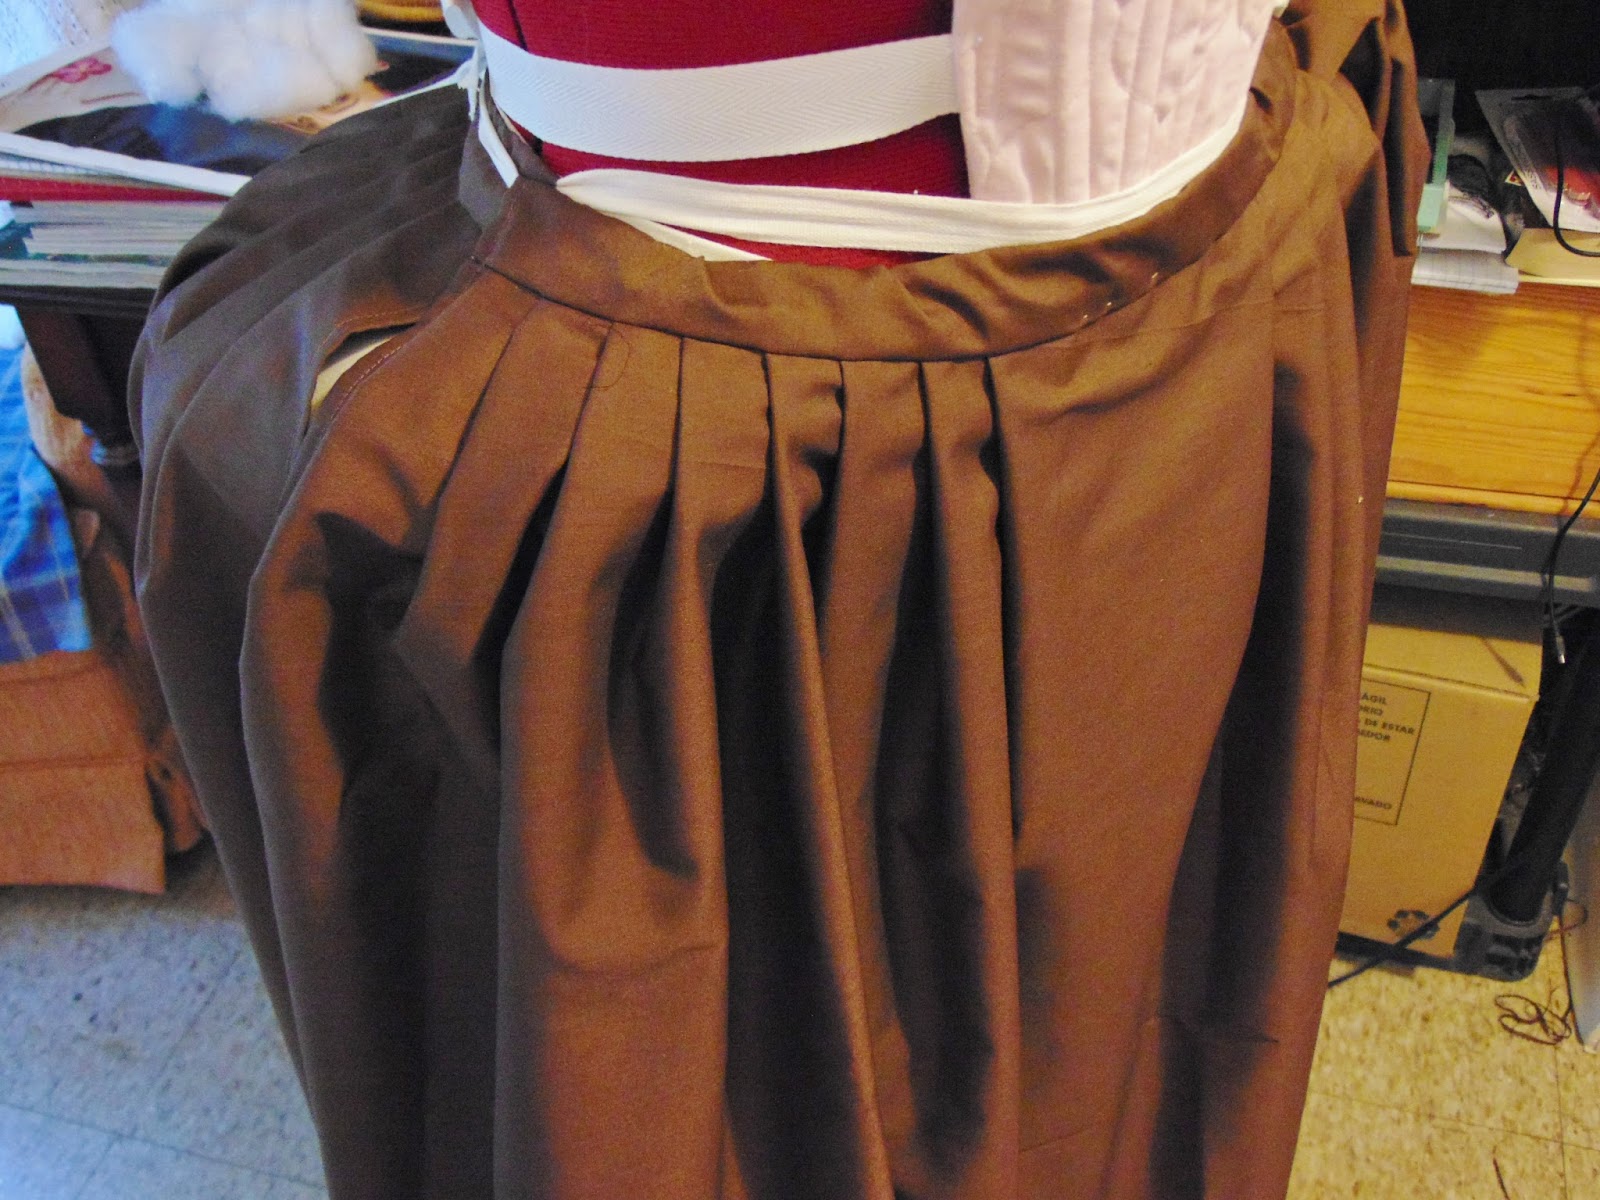
At the seams I added width below the waist level to form inverted box pleats that would then jut out over the bum roll. The pleats are bound closed, but otherwise left free inside (not tacked down flat to the lining as you often see in later Victorian garments using this method).

The lacing closure is done with strips of interfaced osnaburg with hand worked eyelets. The strips are stitched to the fronts through all layers, with the stitching on the outside covered later by the ruching trim on the front edges.


The sleeves are 3/4 length and cut to curve around the elbow. The closure is a done with a 4" overlapping placket with hooks and eyes. The cuffs are trimmed with tight ruching the same as that on the jacket.

(above) the finished plackets pinned to the lower sleeve section edges.


~Stomacher~
This is a simple V stomacher with a rounded point and matching ruffle decoration. The silk is interlined in brown twill, just as the jacket, but also lined in a double layer of osnaburg. It is in he double layer of osnaburg that the 3 boning channels are formed. I used 3/8" pure nylon zip ties for the boning. Steel boning, I find, is too stiff and does not act like real whale baleen anyway. Nylon zip ties are my preferred boning for almost everything.

(below) The pinning tabs are made from scraps of the sari silk, hand stitching down. I highly recommend tabs such as these for two reason; you want to protect the stomacher itself from the damage of constant pinning, but also because the edges of your stomacher will probably be thick with the turned layers, and pinning through that thickness will be fussy and result in a pin bulge (or popped pins later).

(below) showing one of the outside pins attaching the jacket to the stomacher after the stomacher has already been pinned to the stays and/or lacing strips. As you can see, the pin disappears quite well into the tiny space next to the ruching. Another thing you've probably noticed is my disintegrating nail polish job. Yes, I know...I need to do something about that ;) LOL

The stomacher is made from a long strip of silk, pieces from all the remaining scraps (the seams virtually disappear in the ruching). I fold the strip lengthwise into a tube to create clean edges, then using a long machine stitch lay in my gathering thread. After I've gathered and hand stitching the ruching in place, I go back and pick out the machine gathering thread.
~Petticoat~
Most of the sari will be taken up in the petticoat, which is 3 yards by 42". If you require a hem longer than 42 inches, you will not be able to get it out of most saris. As it stands, my back length over a large bum roll was just barely covered by the 42". The front is curved down to be 37" in length.
Although this is a single width of fabric, I made seams on both sides because I wanted plackets on both sides to accommodate the separate front and back waistbands typical of the era.

(below) The waistbands overlap on each side by 2", which helps concentrate extra width on the sides.

Because this silk is so thin, I needed a complimentary under petticoat to shore everything up and make sure the color of the petticoat did not conflict with that of the jacket (if you wore this petticoat over a white under-petticoat, it would look lighter than the jacket. So, I made another plain brown cotton under-petticoat.
~Foundation~
I made a large crescent bum roll for this garment, and the petticoats have been cut to shape over it. The lift it provides creates a 3.5" inch difference in hem length from the front to the back.


~And the Rest of the Sari?~
The sari I chose to use has a large, 32" area at one end of heavily printed decoration in close match to the borders. I had planned to make my stomacher from this area, but decided against it when doing so when it stuck out too much and just didn't flow. instead, the result is a very beautiful silk scarf/fichu measuring 42" x 34".
Folding diagonally, it makes a beautiful matching fichu for this garment. Historical evidence in paintings, fashion plates, and extant museum pieces shows that colored and printed fichus did exist, contrary to the whitework pieces we're used to seeing. They were particularly favored in eastern and southern Europe, where colors were generally more vibrant throughout the 18th century anyway.


~Finished~


No comments:
Post a Comment