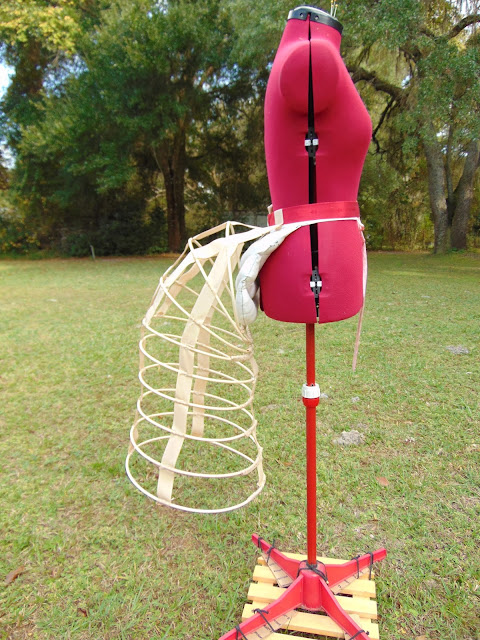
Pattern: None. Built right on the form.
Materials: #8 Round Reed (about 1/4" diameter). Cotton ribbon. Cotton string
Benefits: Very cost effective. Super lightweight, yet strong. Bustle collapses completely on itself and take up a storage space only 14" square, and barely 2" high.
Down Side: Incredibly labor intensive. All hand work, and must be done on the form.
Available on etsy HERE
This thing was a NIGHTMARE. The end result worked and I think the idea is sound, but the amount of labor that went into making it means I won't be reproducing this. Ever. In order to justify making these in any regular way, they would have to sell for like $250 each, which is an absurd price for a bustle. C'est la vie.
Here you see the silhouette this bustle creates under a petticoat
I won't say I had an "Issac Newton under the apple tree" moment, but I was watching my niece play with a slinky and I got an idea: A bustle made of full hoop circles. A slinky is spiral in shape, of course, but it gave me the idea. And, as always, necessity was the mother of the invention.
I bought a bunch of #8 round reed a few weeks ago, thinking I could use it in place of spring steel/hoop wire in standard cloth channel bustles. Well, it didn't work. Mostly because the "springiness" of the reed eventually wears off and the tension starts pulling the reed in on itself into a circle. So, I thought that if the reed wants to be in a circle, why not let it?
~Finished~
A video showing how the bustle collapses to such a small space. Sorry for the poor quality, but it's just me and my handheld. I really need to get a tripod...


No comments:
Post a Comment