
Fabrics: Crisp dress taffeta, poly/rayon, in a reddish brown color shot with black. Lining is netting on the overskirt and broadcloth on the bodice.
Measurements:
Chest: 37-38"
Waist: 28"
Hip: <42"
Hem: 40" at front.
Back Width: 14.5"
Bicep: 13" max

Summary:
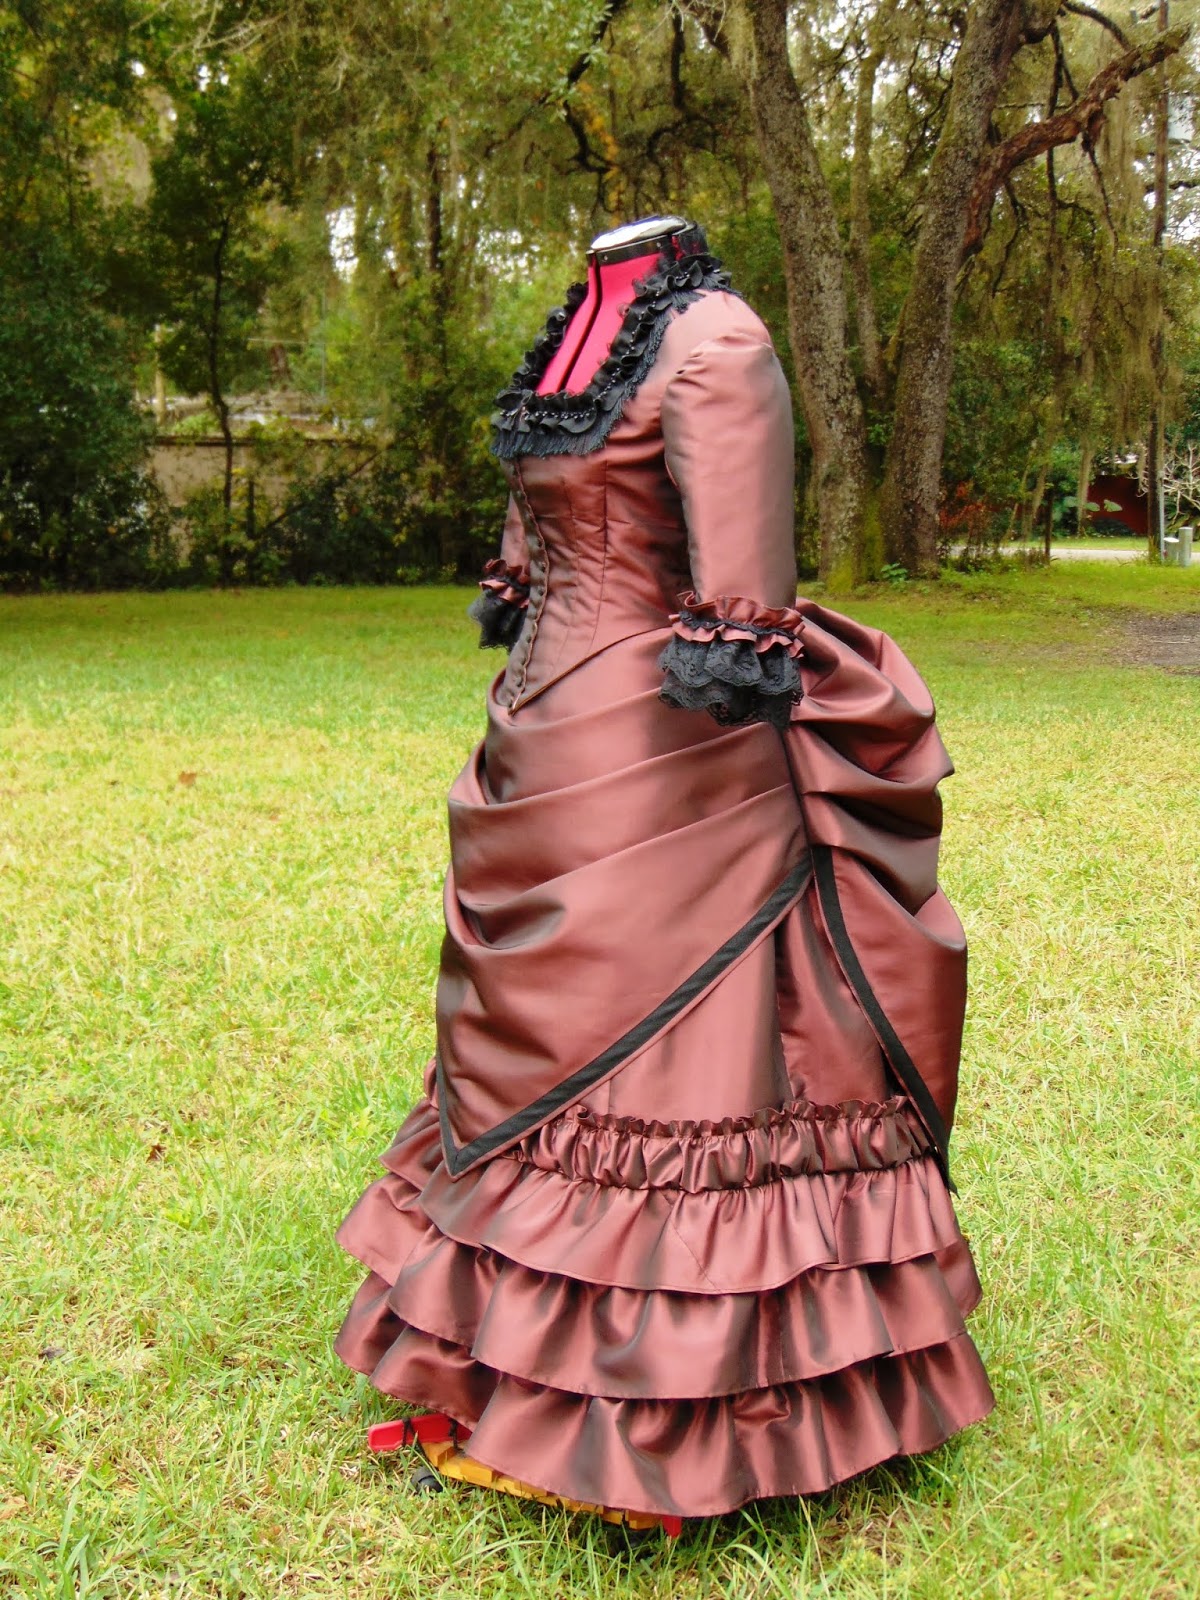
An 1870s (early bustle) dress in red-plum taffeta with three parts: Bodice, Over-skirt, and Under-skirt. The black trim on the over-skirt and parts of the bodice is 100% linen, in bias strips and applied like ribbon. The bodice has light boning on the front darts. The sleeves are just past elbow length, with ruffles of lace, taffeta ruching, and black cotton bullion trim applied by hand. The entire ensemble is over a medium size "lobster tail" bustle. The underskirt has three rows of ruffles and a top row of ruching.
This is my second time doing the "split tail" alteration of the TV305 overskirt pattern. I have loved this pattern for years because it is simple, elegantly shaped, and lends itself so easily to alterations and decoration.
I ended up doing the split-tail in the first place simply because I prefer skirts and overskirts to have center back closures whenever possible. It makes it much easier to do fit alterations when/if necessary. You can't just "take in" a side closure, because it would cause the center front and back to shift over. You end up having to do the alterations at both sides evening, which requires taking apart the whole waistband and blah-blah. Anyway, center-back closures are the way to go.
So, since I was going to add a center back seam to a pattern that doesn't come with one, I figured I might as well do something with it and decided to set the pleats into that seam rather than puff up the back with the standard ribbons and tack stitching. I also cut the bottoms of the back to point to emphasize the double tail thing.
 |
| The center back has a few hooks and eyes below the waistband for full closure. |
To get the right shape on this over-skirt pattern, I highly recommend flat lining in netting, stiff organza, or something similar. I used dress crinoline (which really isn't crinoline, they just call it that now in fabric stores). It's a higher grade netting with smaller holes and less stretch than the usual netting people use to make cleaning scrubbies. It's still very cheap, though, usually $2 or less a yard.
Another great feature of flat-lining like this is you can hem all edges and secure them to the lining by hand, thus having no visible top stitching on the outside. This is especially great for velvet, which looks terrible with top stitching.
I also recommend cutting the front apron piece a size larger than the pattern chart calls for. I think the overall look is better (and the pleats hold their shape better) when the side seam is a bit further back.
I also recommend cutting the front apron piece a size larger than the pattern chart calls for. I think the overall look is better (and the pleats hold their shape better) when the side seam is a bit further back.

The over-skirt also has ties at the back, inside, to help pull the front apron back into position. This also helps to keep the proper shape.
FINISHED
Now, the always necessary dozen-or-more photos from every angle.


Very nice
ReplyDeletehttp://mode.femmes-1900.com/