
Ensemble includes separate patterns for:
Blouse
High-waisted skirt
Coat
Measurements: *Patterns in the Hill/Bucknell book have been sized to an average 25/26" waist, and 35" bust. I did not grade this pattern, but made it "as is" from the book. These were my final dress form measurements during mounting of the finished garments
Chest: 35"
Waist: 27"
Hip: 38"
Hem (from natural waist): 39"
Back width: 14"
Neck: 15" max
Wrist (for blouse): 7.5" max
Sleeves from shoulder (blouse): 22"
Sleeves from shoulder (coat): 23"

~Skirt~
This is a high waisted skirt with seams boned to 4" below natural waist height. Now, I will admit I had a lot of problems with this pattern, but those were mostly a result of me not reading the darn instructions (what little there are in the book).
1st problem: Pattern didn't meet up...except it did.
As you can see from my little 1/8th scale cutouts below, the front-side piece looks much too long to meet up with the front and side seams. This is because, unbeknownst to me at the time, that piece is supposed to have tucks near the hem, thereby making it line up. I chopping the extra length off before noticing this, but it wasn't dire. Just means my finished skirt didn't have cute decorative tucks on this section.

2nd Problem: Lining the whole skirt was a mistake.
Since the top of this skirt is fitting almost like a corselette, I knew I had to have interfacing and lining at the waist level, so I chose to line the entire skirt. I wish I hadn't. The pleats at the front should be well defined and heavily pressed, which is much more difficult when you're trying to get a lining to stay in there.
I highly recommend ending your lining where the box pleats begin (so you have the lining to whip-stitch your pleats to inside). OR, I recommend altering the shape of your lining to not include the pleats at all. This second option will make whip-stitching the top of your pleats more difficult, though.

(below) I decided to set my closure at the center back (the pattern calls for a side closure). I left the center back seam open while boning the seams. It's much easier if you wait until after doing the boning to close up whatever seam will have your closure. The black fabric is a twill interfacing.


~Blouse~
Probably my favorite part of the ensemble, because it's the least complicated and came out without me having to "finagle" things. This type of blouse has the body and top portion of the sleeves cut as one, so there is no armhole at the shoulder. This results in a very pleasant, relaxed look at the shoulders, which I really like. My the only downside is that this style means the sides under the arms act as a kind of low armhole. If this bothers you, just cut the curve higher, essentially "raising" the armhole.

The tucks in the lower sleeves are very useful in adjusting length to the wearer, but be careful. The lower portion of the sleeve is very tight. You will definitely have to have a slit opening or a placket of some kind, as the wrist is too tight when closed to slip over a hand. I left mine open 4" and added hooks/eyes for closure with no overlap.


The collar is curved at the top so it is slightly taller at the sides, with that little dip to fit under the chin. I am a huge fan of the high and tight collars of the Edwardian period. Very regal looking =) This one I interfaced with white twill and lining in plain white cotton.

(above & below) I think you can see what I mean about the "armhole" being low, an effect of the top sleeves being cut in one piece. I think it is a very attrractive style on it's own, but it does making putt a coat on over it kind of fussy, since the coat has higher, more defined armholes.

~Coat~
I had to make quite a few changes to the coat pattern. Firstly, be warned that the pattern does not have closure overlap built in at the center fronts. You will have to add for overlap and seam allowance, probably 1.5". This coat isn't really meant to be "closed" anyway. It acts like more of a decorate bolero, being left open. If you do wish to make it for full closing, I recommend extending the front 2.5" instead of 1.5"
Second, the sleeves are too big. I don't know if the seam allowance was already built in or what, but they are too wide and too long for the size of everything else in the darn ensemble. Narrow and shorten them. The pink lines on the image below show where I would probably cut my pieces next time. Definitely move the dart on the fronts closer to CF. As if, the darn things are practically in the armpit during wear, which just doesn't work.

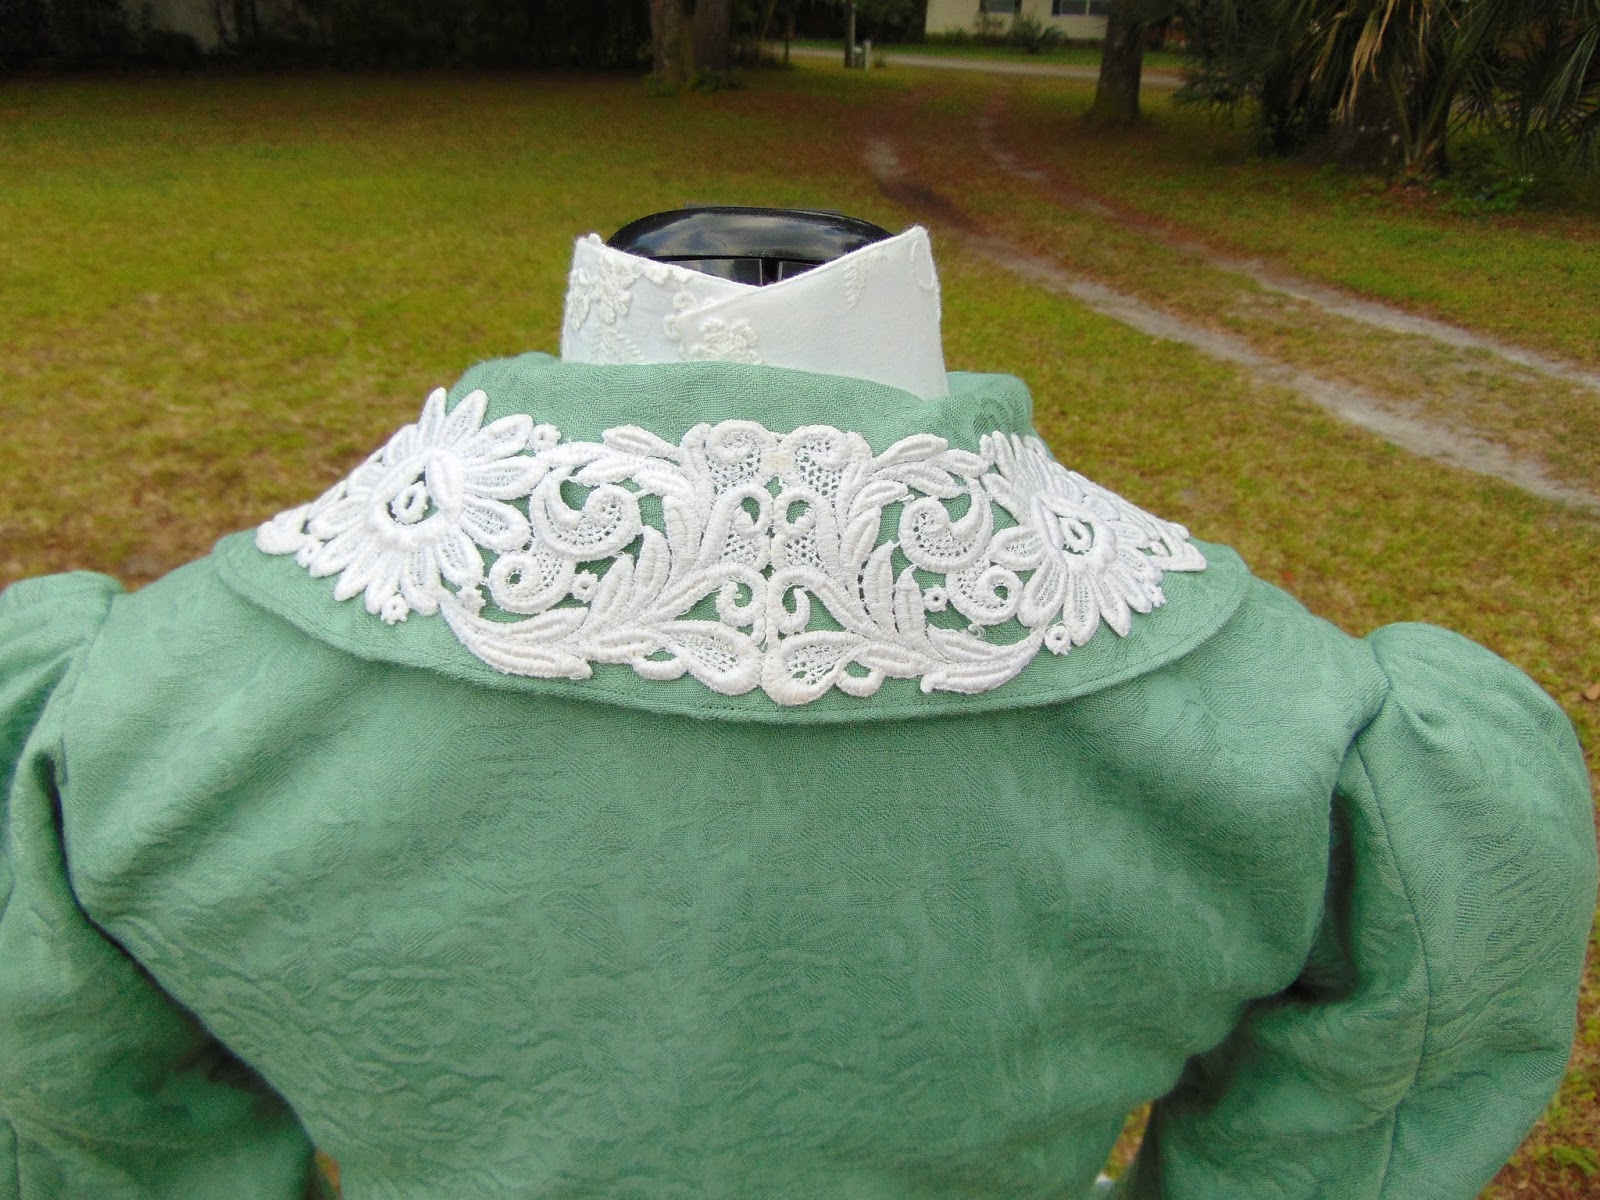
(below) The cuffs are built into the sleeves rather than being a separate piece with a horizontal seam. They fold back, requiring you to face that section of the lining in order to make it work. I faced mine back 1.5" past the fold point and did my applique work before stitching the outside seam of the sleeves.

I have this gorgeous, heavy cotton lace that I have been holding onto for years. I never used it because the lace was made curved, not really allowing it to be placed on a straight hem. I decided to cut up portions and rearrange them as appliques. I hand stitched them on around all edges rather than do haphazard lines with the sewing machine.

As this coat has lapels to fold back, you will have to face the lining.


~Finished~


Gorgeous! I love the over jacket! Beautiful choice of Materials!
ReplyDelete